Limit Provider and Service Options

You can now limit the provider and service options available to clients when they schedule appointments online.

You can choose to not show providers during the booking process and instead automatically assign the appointment to a provider with the selected opening. This works well if your providers are not known to clients or if you use the provider fields to represent non-staff resources.Limit Services Providers

You can also choose to not let clients book multiple services on a single booking. By default, clients can select more than one service when they schedule an appointment. Now, if you want to let clients only book one service on each appointment, you can.

And you can now remove the option to schedule another appointment at the end of the booking process. The default booking workflow includes a link on the “success” page to “schedule another” appointment, which lets clients schedule multiple appointments with ease. But if you don’t want to encourage clients to book more than one appointment, you can now remove this link.

To turn on any of these new limits, go to the bottom of the Setup > Booking Details page.

Tagged : / /

Add Overviews to Your Services Menu

You can now display an “overview” for each service you offer. An overview is a brief description that can help clients determine at a glance which service is best for them.

Clients will see the overview on the list of services on your landing page, website widget and Facebook page.

You can still also include more detailed service descriptions that clients see after selecting a service.

To add service overviews, simply go to Setup > Services, select a service and click ‘overview’.

Tagged : /

Enhanced Client Payment Options

You now have more control over how your clients pay when scheduling appointments.

If you require clients to submit credit card information to hold an appointment time (without actually charging the card at the time of booking), you can now choose to remove their ability to also pay for the appointment at the time of scheduling. This works great if you have a separate payment processor and want to use the Full Slate ‘credit card capture’ feature only for no-shows. This works the same way if you require clients to pay a deposit at the time of scheduling.

Also, you no longer need to have prices on your services in order to use the ‘credit card capture’ feature.

Please see the help file to learn more about collecting credit card information at the time of scheduling.

Thanks for the feedback everyone…please look for more updates to our client payment features down the line!

Tagged : /

Invite Clients to Register

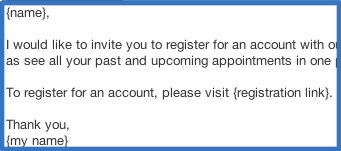
Encouraging your clients to register for a Full Slate account is easier than ever. Using the new built-in email template, you can invite clients to sign up and their account will automatically be linked with your client record.

You can customize the new template — titled ‘Invite Client to Register’ — under Messages > Templates. To send it to a client, open up the client’s record under Clients > Details, click ‘Send message’ and select that template. Or you can send out the template in bulk under Clients > List. The email includes a link with a unique code, which when clicked by your client will take them to a registration page with their name and email pre-filled. They just need to enter a password and they’re done.

You’ll know they’ve registered when their client record says  “Registered as [email protected]”.

Full Slate does not require registration to book an appointment, but both you and your clients benefit from registration. So invite your clients to register today!

Tagged : /

Skip Ahead Weeks At a Time

Now you can fast forward on your schedule weeks at a time with a single click.

Say at the end of a session, your client wants to schedule their next appointment four weeks out.  Just click the number “4” to jump to four weeks from today on your schedule.  No need to count or calculate – with a single click, you can be confident you’re on the week you want.

Just as importantly, this new timeline tells you what week you’re viewing by highlighting the number of weeks out you are, so it’s easy to stay oriented in time.

You’ll find the fast forward feature just below the mini month calendar on the left side of your schedule. Oh, and we moved the “Today” button there too since it goes hand-in-hand with the timeline.

Happy skipping!

Tagged :

'Add' Button Reveals Openings

Did you know you can use the ‘Add’ button on the Schedule tab to expose time slots clients see?

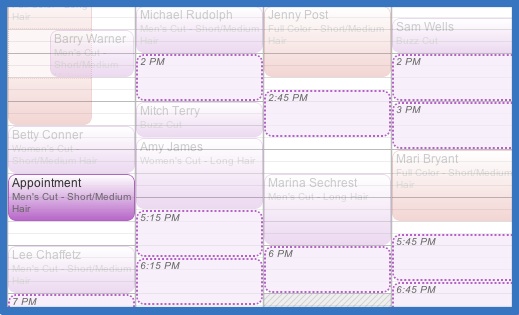
Yep, if you click ‘Add’ above the calendar and select a service, available time slots will appear on your calendar which you can click to book an appointment. These are the same time slots that will be presented to clients on your website, landing page or Facebook. All your key settings are considered, including service duration, setup & cleanup times, fixed start times (established under Appointment Times) and optimization settings. Openings inside your advance notice window will be presented (even though they are of course not presented to clients).

So if you want to quickly view the openings your clients are seeing, no need to navigate to your website or landing page, just pull it up right there on your Schedule tab!

Tagged : /

Keyboard Shortcut for Your Schedule

Did you know you can use the arrow keys on your keyboard to move around in your Full Slate schedule?

Yep, if you want to go forward in time on the Schedule tab, use your “right” arrow. If you want to go back in time, use your “left” arrow. If you’re on the week or weekday view, you’ll move to the next week, and if you’re on the day view, you’ll move to the next day.

So no need to point your cursor at the small arrows above the calendar, which is especially handy when you want to arrow forward or backward many weeks.

If you love shortcuts, you might also check out this blog post about a quick method for entering a new client right on the Schedule tab.

Tagged : /

Past & Upcoming Appointments on Mobile

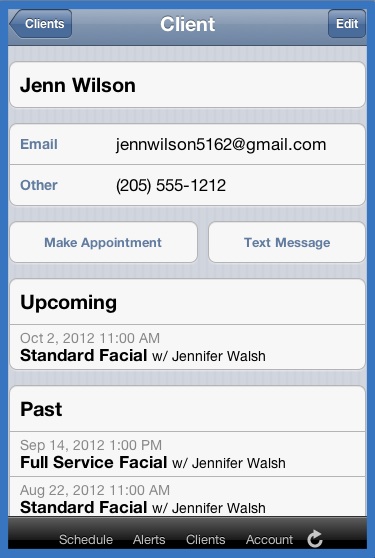
You can now view a client’s past and upcoming appointments on your mobile phone. Do clients occasionally call to find out when their next appointment is? Do you need to know details from a client’s last appointment in order to book their next one?

No more scanning endlessly through your busy calendar. Now you can quickly find the information you need to answer client questions and book their next appointment.

To view past and upcoming appointments on your iPhone or Android, click on the Clients tab, select the client you need and you’ll find all their upcoming and past appointments at the bottom of their client details page. Click on an appointment for notes and other details.

For more on Full Slate Mobile, click here.

Now it’s even easier to stay on top of your schedule on the go!

Tagged : / / /

Benefits of Client Registration

When your clients register for a Full Slate account, they benefit in many ways…and so do you.

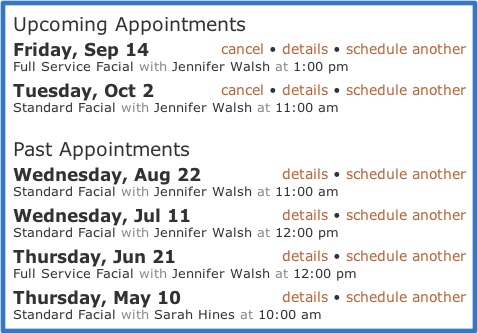
Full Slate does not require clients to register to schedule appointments online. But if your clients choose to register, which takes less than a minute, there’s much to gain. After they register, they will no longer have to re-enter their contact information each time they book an appointment. Even their credit card information will be available if you offer online payments. They’ll also be able to see all their past and upcoming appointments including the date, provider and service. And best of all, they’ll be able to cancel and reschedule any upcoming appointments within your cancelation rules.

You gain too when your clients register. Because clients can easily cancel and reschedule online, as well as see their past and upcoming appointments, they’re much less likely to call or email you. Further, when your clients log in to book an appointment, you can be assured their appointment will be matched with your client record, avoiding duplicates.

Clients are provided an opportunity to register after they book an appointment. You can also invite your clients to register by directing them to your registration page, which is at https://yourlandingpage.fullslate.com/register (just be sure to include your landing page in that web address).

You can determine if a client has registered for a Full Slate account by viewing their record under Clients > Details. At the top of the gray box on the right, it will either say “Not registered” or “Registered as [email protected]”.

We won’t market to your clients or sell their information to others, so go ahead and encourage your clients to register today!

Tagged : / /

Block Specific Clients from Scheduling Online

Now you can block specific clients from scheduling appointments online with you. Once you block a client from self-scheduling, they won’t be able to complete the online booking process after entering their name and contact information. Instead, they will receive the following message: “Your appointment is not booked yet. Online scheduling is unavailable. Please contact us by phone or email to complete booking.”

To block a client, simply go to their record under Clients > Details and check the “No self-scheduling online” box.

This is just one more way Full Slate lets you control your schedule and manage your business. Thanks to everyone who requested this feature!

Tagged :