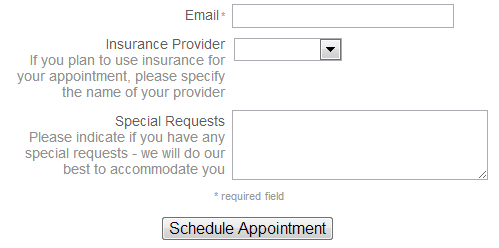
 If you make use of custom fields on your scheduling form, it’s easy to provide your clients with instructions on what to enter. Just go to Setup > Booking Details and click the ‘add instructions’ link next to the custom field you want to update. Enter the desired instructions in the text box and then be sure to click ‘Save’ at the top of the screen. Instructions will appear just below the custom field label on your scheduling form.
And remember, you can add a variety of custom fields to your scheduling form. Use custom fields to capture address information, birthdays, ‘how did you hear about us?’, promotion codes, special requests, etc. You can even create a multiple choice field that presents clients with a drop-down list of customized options.