Include Expiration Date & Terms on Gift Certificates & Packages

Screen Shot 2013-07-16 at 10.10.50 AMYou can now set an expiration date and include other terms on a gift certificate or package. These appear in fine print right on the face of the voucher so your client is sure to see the details.

Since many states in the U.S. prohibit gift cards from expiring, the default is  “never.”  However, you can change it to expire on a specific date (i.e., December 31, 2015) or a certain number of days after purchase, (i.e., 5 years from today) under Setup > Gift Certificates & Packages.  You can also manually set the expiration date for individual vouchers on the Sales tab.

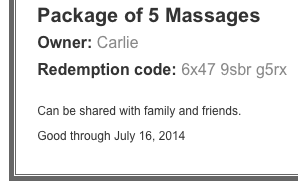
This expiration date is included on the voucher when it’s printed out or emailed to a recipient.  You can also add other terms – like redemption instructions, any exclusions or other limitations – to the fine print.  (We know you want to be able to add your logo and customize the certificate too – we’ll get to that soon.)

Once a voucher has expired, it can no longer be redeemed online.   You can still accept it if you wish; simply check the box to include expired codes on the Sales tab then adjust the balance or extend the deadline on a one-off basis.

Tagged : / / /

Hide Empty Columns on the Calendar

hide-empty-columnsThere’s a new option on the Schedule tab under the “More” menu to “Hide empty columns.”  When checked, this maximizes the screen space devoted to days and staff that actually have appointments or availability.

So you can see just work days, no matter if they don’t happen to be Monday through Friday — or even consecutive!  Just set the view to “Week” and any days when you don’t work are automatically hidden so they don’t take up extra space on your schedule.

You can use “Hide empty columns” with multiple staff in separate columns, too. Then only staff with availability or appointments will show on the schedule, and anyone with the day off will be hidden.  As you move forward or back in time, the staff who are scheduled to work on those days will appear automatically.

Tagged : /

Skip Ahead Weeks At a Time

Now you can fast forward on your schedule weeks at a time with a single click.

Say at the end of a session, your client wants to schedule their next appointment four weeks out.  Just click the number “4” to jump to four weeks from today on your schedule.  No need to count or calculate – with a single click, you can be confident you’re on the week you want.

Just as importantly, this new timeline tells you what week you’re viewing by highlighting the number of weeks out you are, so it’s easy to stay oriented in time.

You’ll find the fast forward feature just below the mini month calendar on the left side of your schedule. Oh, and we moved the “Today” button there too since it goes hand-in-hand with the timeline.

Happy skipping!

Tagged :

Different Access Levels for Staff

Did you know you can assign different access levels to staff with Full Slate accounts? Here’s how…

Go to Setup > Staff and either select an existing staff member or create a new one.  Next to “Allow this staff member to log into Full Slate?” click the drop-down to see available access level options.  You may choose:

  • Yes, with full access – This level is equivalent to ‘administrator’ privileges and includes access to all staff schedules, clients, messages, web tools, and account settings. An account has to have at least one staff member with full access, but you can assign it to others if you want to share responsibility for maintaining the account.
  • Yes, to all schedules – This level allows a staff member to make appointments for other staff members, but they can’t view or change account settings.  It works well for a receptionist or front office coordinator who manages the appointment book.
  • Yes, to own schedule – This level allows a staff member to view and manage their own hours and appointments.  They can’t see schedules of other staff and can’t see a full list of clients.  They also can’t see account settings.
  • No – Set the account to this level if you don’t want the staff to be able to login to Full Slate at all.  Clients may still schedule with them (if they are set to perform services) and they can receive appointment notifications, if desired.

Also, when setting up new staff, be sure to click ‘send invitation’ if you want them to be able to log into Full Slate.  This will send them an email with a link to create a password and log in.

Tagged : / /

'Add' Button Reveals Openings

Did you know you can use the ‘Add’ button on the Schedule tab to expose time slots clients see?

Yep, if you click ‘Add’ above the calendar and select a service, available time slots will appear on your calendar which you can click to book an appointment. These are the same time slots that will be presented to clients on your website, landing page or Facebook. All your key settings are considered, including service duration, setup & cleanup times, fixed start times (established under Appointment Times) and optimization settings. Openings inside your advance notice window will be presented (even though they are of course not presented to clients).

So if you want to quickly view the openings your clients are seeing, no need to navigate to your website or landing page, just pull it up right there on your Schedule tab!

Tagged : /

Instructions for Custom Fields

If you make use of custom fields on your scheduling form, it’s easy to provide your clients with instructions on what to enter. Just go to Setup > Booking Details and click the ‘add instructions’ link next to the custom field you want to update. Enter the desired instructions in the text box and then be sure to click ‘Save’ at the top of the screen.  Instructions will appear just below the custom field label on your scheduling form.

And remember, you can add a variety of custom fields to your scheduling form.  Use custom fields to capture address information, birthdays, ‘how did you hear about us?’, promotion codes, special requests, etc.  You can even create a multiple choice field that presents clients with a drop-down list of customized options.

Tagged :

Keyboard Shortcut for Your Schedule

Did you know you can use the arrow keys on your keyboard to move around in your Full Slate schedule?

Yep, if you want to go forward in time on the Schedule tab, use your “right” arrow. If you want to go back in time, use your “left” arrow. If you’re on the week or weekday view, you’ll move to the next week, and if you’re on the day view, you’ll move to the next day.

So no need to point your cursor at the small arrows above the calendar, which is especially handy when you want to arrow forward or backward many weeks.

If you love shortcuts, you might also check out this blog post about a quick method for entering a new client right on the Schedule tab.

Tagged : /

Encouraging Clients to Schedule Online

Every business is different, but many of our customers are seeing two-thirds or more of their clients schedule their appointments online.  Want to get more of your clients to schedule their appointments online?  Here are 5 things you can do to encourage online scheduling:

  • Email clients an invitation to schedule online.  You can do this individually or for a large group of customers.  Use our ‘Client Invitation’ email template or create your own.  Just be sure to include a link to your website or landing page.
  • Mention online scheduling to your clients before, during or after their appointment.  Let them know how easy it is and how other clients like the convenience.
  • Update your voicemail to let clients know that online scheduling is the fastest, easiest way to schedule their next appointment. Be sure to tell them the address of your website or landing page.
  • Put signage in your place of business. A window cling near the door and/or a small placard in your reception area serve as great reminders.
  • Update any printed materials to direct clients to schedule online: business cards, appointment cards, ‘thank you’ notes, stationery, invoices, receipts, etc.

We’d love to hear your ideas and success stories about getting clients to schedule online!

Tagged :

Benefits of Client Registration

When your clients register for a Full Slate account, they benefit in many ways…and so do you.

Full Slate does not require clients to register to schedule appointments online. But if your clients choose to register, which takes less than a minute, there’s much to gain. After they register, they will no longer have to re-enter their contact information each time they book an appointment. Even their credit card information will be available if you offer online payments. They’ll also be able to see all their past and upcoming appointments including the date, provider and service. And best of all, they’ll be able to cancel and reschedule any upcoming appointments within your cancelation rules.

You gain too when your clients register. Because clients can easily cancel and reschedule online, as well as see their past and upcoming appointments, they’re much less likely to call or email you. Further, when your clients log in to book an appointment, you can be assured their appointment will be matched with your client record, avoiding duplicates.

Clients are provided an opportunity to register after they book an appointment. You can also invite your clients to register by directing them to your registration page, which is at https://yourlandingpage.fullslate.com/register (just be sure to include your landing page in that web address).

You can determine if a client has registered for a Full Slate account by viewing their record under Clients > Details. At the top of the gray box on the right, it will either say “Not registered” or “Registered as [email protected]”.

We won’t market to your clients or sell their information to others, so go ahead and encourage your clients to register today!

Tagged : / /

Client Registration Not Required

Did you know your clients don’t have to create a Full Slate account to book an appointment but you can still maintain a full history on each client?

Though there are compelling reasons for your clients to register for a Full Slate account (more on that in a future blog post), some clients prefer not to. And what will these clients do if they’re required to register? They’ll pick up the phone and call you, starting the inevitable game of phone tag…or worse yet, decide not to book an appointment after all. That’s why Full Slate does not require client registration; we don’t place barriers in front of your clients that might discourage them scheduling online.

“But won’t that result in a new client record every time my clients book an appointment?” you say. No, because Full Slate employs sophisticated logic to match client bookings with existing client records. As a general rule, if there’s a match on client email and a close match on client name, Full Slate will match the client booking with the client record. For example, if you have client Dan Fowler with email [email protected] in your client list, and Dan books (without registering) as Daniel Fowler at [email protected], Full Slate will match them up.

And in cases where a duplicate client record is created, you can easily merge the two records using the handy client merge feature!

Tagged : / / /